
How To Change Your Grout Color
Change the color of your grout
By Julie Schmale
To err is human. We all make mistakes. Today I’m sharing one of mine. More importantly, I’m going to show you how I fixed it! When we built our house, we did a really good job (I think). However, there are a few decisions that have turned out to be bad ones…. Like the one I’m featuring in this blog….
I’m a bit of a fear-of-failure-person. Okay, I’m a LOT of a fear-of-failure-person. Luckily not as much anymore… I am learning that it’s okay if I don’t get it right all the time. This applies to all areas of life. This is much easier said than done though. Today, let’s celebrate learning by trial and error! So read on and feel free to shake your head at my folly!

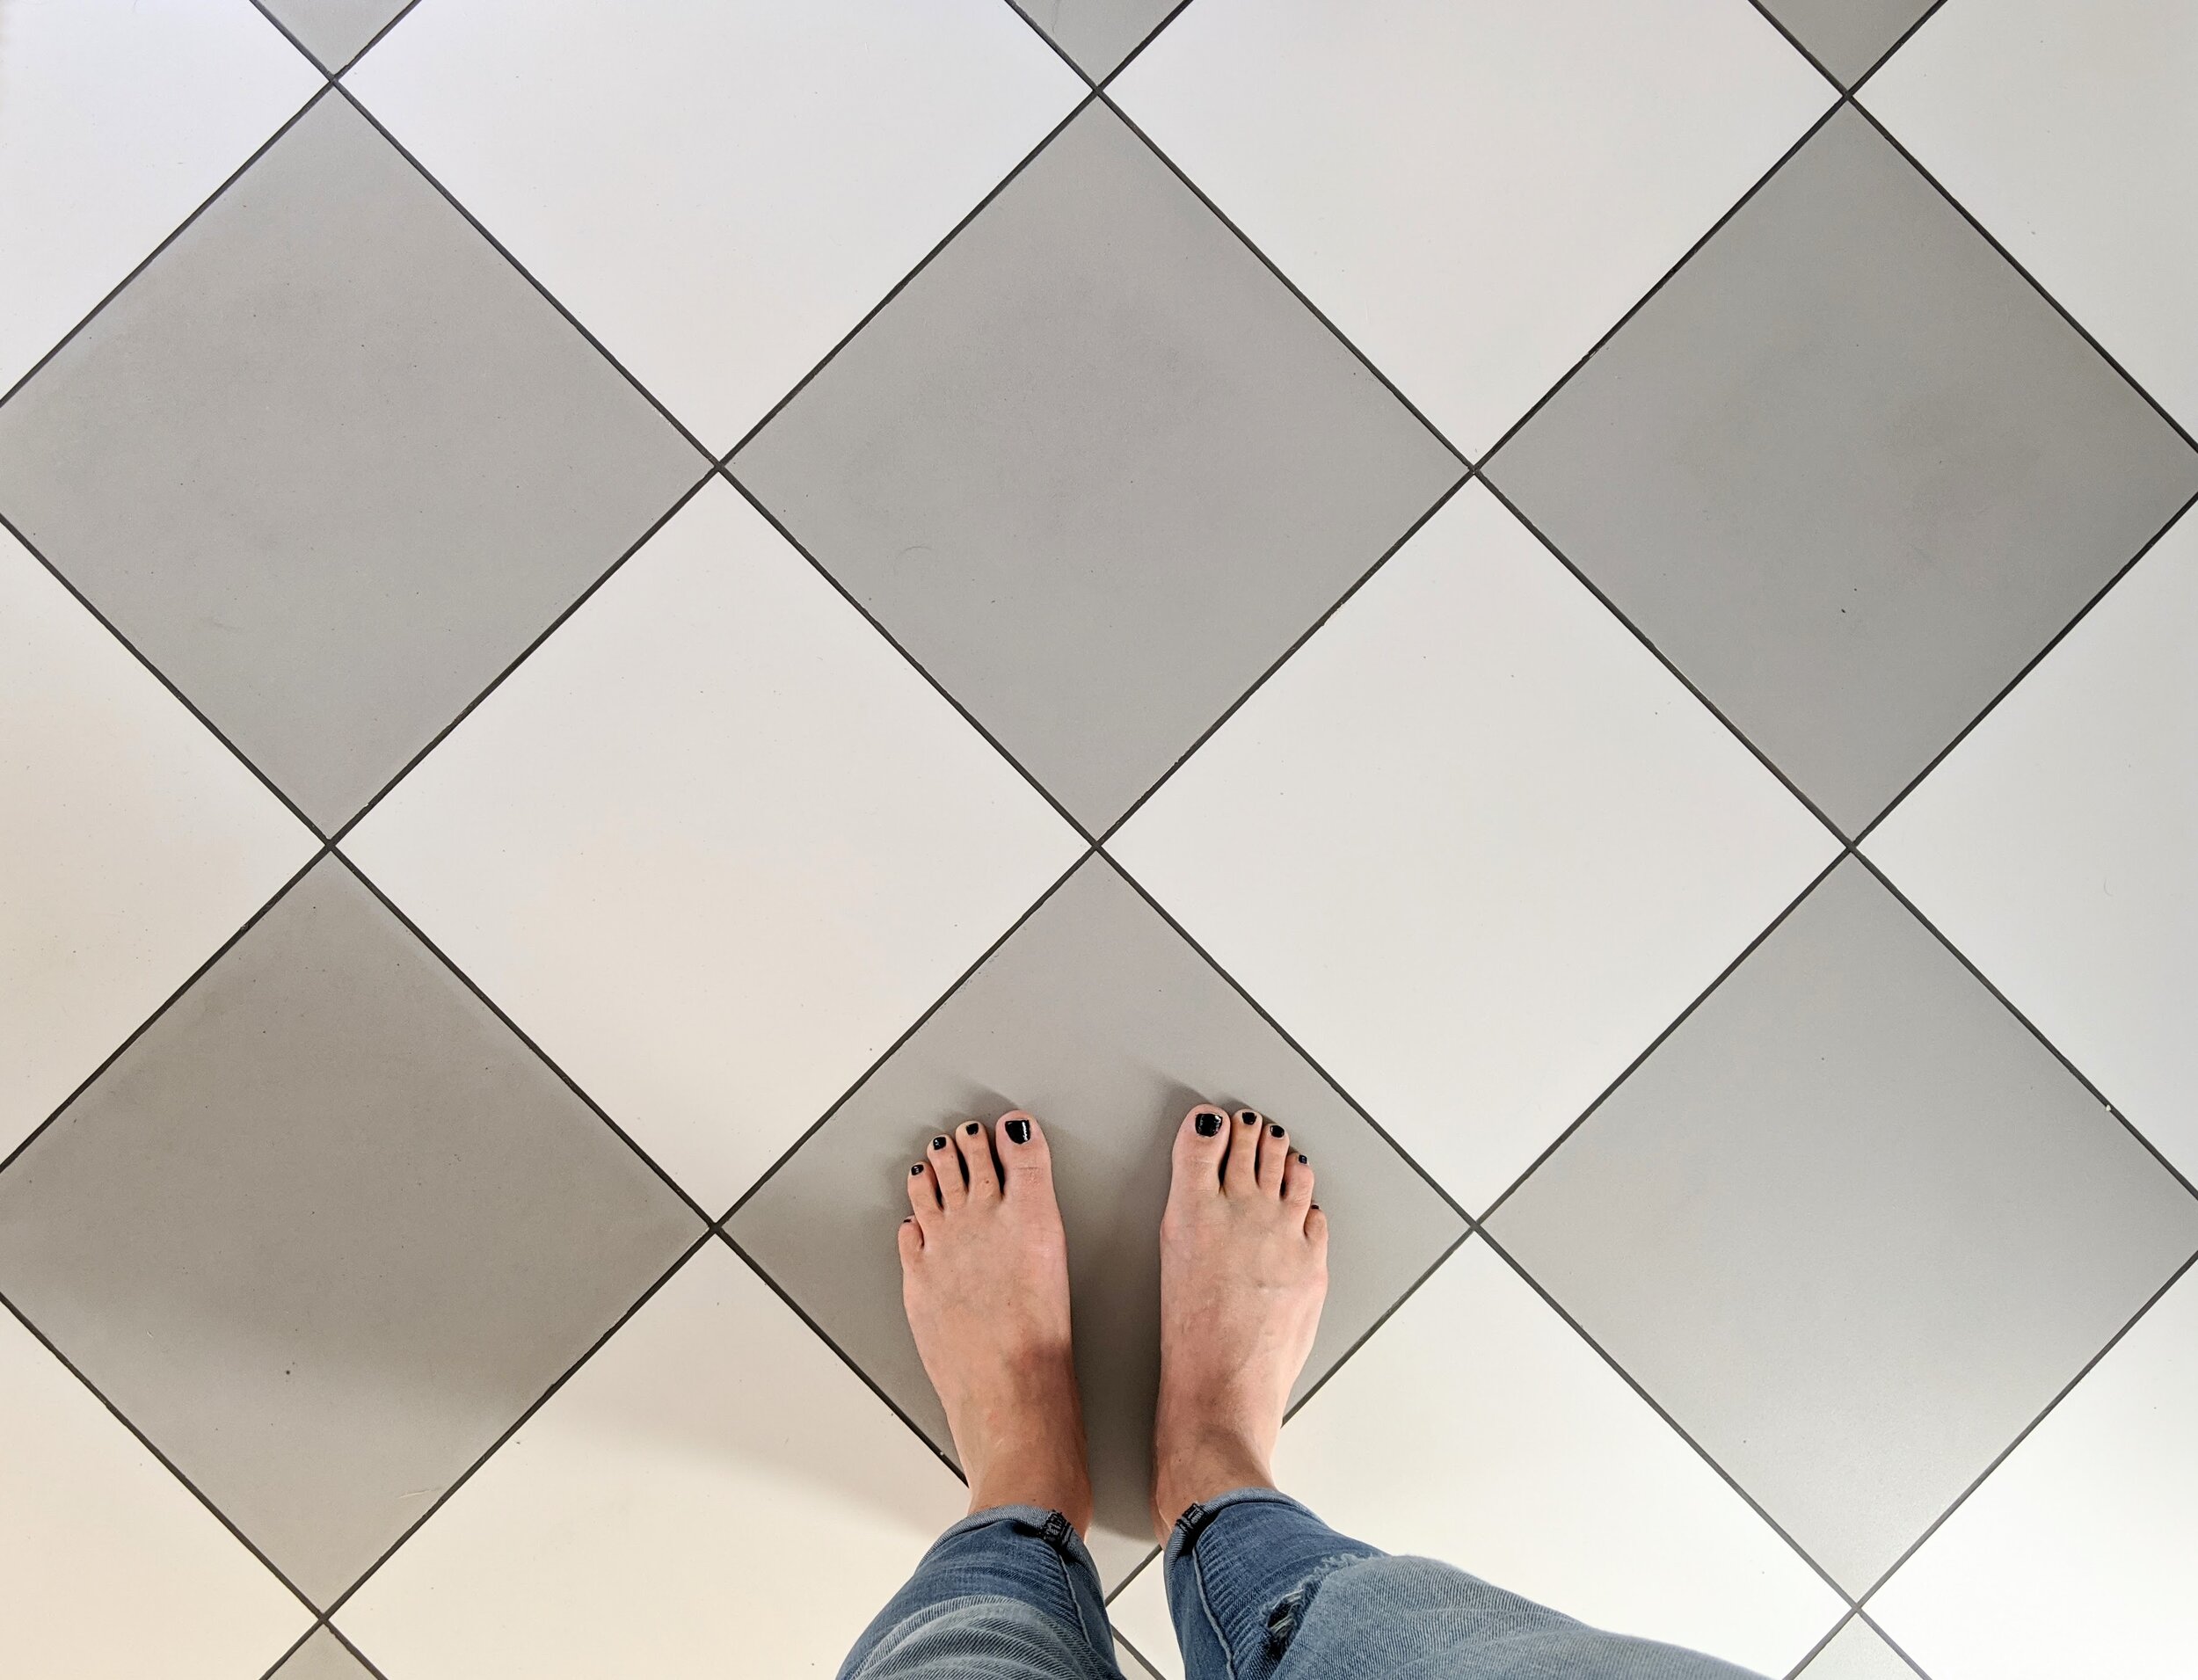
For our mudroom and main entrance, I wanted grey and white tile. To get a more blended look, I chose white grout that matched the white tiles. Yep, you read it correctly. WHITE grout….. for my FLOOR…. You are probably smarter than me and can immediately put the two together and see that this is a baaaad idea. My hubby probably even told me it was a bad idea…. But it was what I wanted, so it was what got applied…. And it looked pretty. Until we moved in!
Fast forward 3 years and that grout is not white…. It’s sort of a light brown…. It just looks bad. And dirty. Always dirty.
Why am I telling you this?
While working in the home-reno field, I came across this product that enables you to freshen up or change the color of your grout! I was very excited to get my hands on this product. Hurray for me and my poor decision making!
The reason I am writing a blog about it is because I got to thinking that there might be other people who’ve made similar mistakes. Or maybe you moved into a home that have perfectly fine tiles, but grout that tells the tale of someone else’s messy life. Maybe you have a shower that just makes you sad…. Our water here in rural Saskatchewan is hard and leaves a yellow or pink residue on the tiles and grout in the shower -and it mocks us (and our lack of thorough cleaning) every time we take a shower! Replacing your tile can be expensive and sometimes not worth it, so if any of these scenarios are you -this product could be a great option for you.


I used Mapei Grout Refresh (it comes in all the Mapei grout colors). There is a similar product by Custom out there too, so whtever color you are looking for, you’ll be able to find it!
How it works
You are basically painting the grout line, leaving it soak into the grout itself and then wiping any excess off the tiles afterwards.
Now, when I say “paint” please don’t freak out! It’s not going to wear or chip off as far as I can tell. I tested my own floors 10 days after application by washing it the same way I had done when I cleaned it prior to this project. Comet, water and a brush. I figured this kind of cleaning will be the most contact the grout lines will ever have. There was no color change, no color coming off anywhere, so to me it looks like it will stand up to everyday life and I should not have to baby it.
There’s a dry method and wet method depending on the tile you have. Dry for smooth tiles. Wet for textured tiles.
I will say, this is tedious work! But if you are covering up dirty grout or a bad design decision, it’s worth your time! I found my tile to be more complicated because the white tiles are smooth, but the grey ones are textured enough to make the dry method a lot harder. So, in the end I did dry on the white edges and wet on the grey edges. Lucky for you, I have now tested both application methods!

I washed my floors really well. I used Comet and a brush to get as much dirt off the grout as I could. I suggest cleaning at least the day before. That way the grout has time to dry out completely and be “thirstier” when you apply the paint. The bottle says to shake well before use. This is important! I had to shake a LOT. And then some more. If it comes out with a see-through liquid, you’ll need to shake it again. The consistency should be thick, like paint.

I applied a thin line of the gout color, used a small brush to spread it, then set a timer for 5 min (It’s not super time sensitive). After the 5-ish minutes I went back to scrape the excess off the white (smooth) tile edges while at the same time setting a new timer for 20 min. Make sure the grout on the smooth tiles look dry. If there are wet areas leave them till they’re dry. Otherwise you’ll just smear the color all over your tile! Make sure you don’t wipe right ON the grout line. Once the second timer went, I sprayed the grey (textured) tiles with water, waited another 5 min, and then scraped the excess off the grey (textured) tiles. It’s important to wait the 5 min in order for the paint to let go of the tile. Again, make sure you don’t wipe right ON the grout line. It wipes off pretty easily prior to drying completely.
Like I said, this is very tedious. In my situation, it was worth it. I would even say necessary.

I found it hard to take the excess “paint” off the tiles without touching the grout line, so I ended up using a paint can opener under the cloth I was using. I found that it was easier to control while applying enough pressure. When I had spots I accidentally got the grout line wiped, I left it and fixed it when I began a new area. The paint scraps can be wiped off or you can vacuum them up before moving to a new area. I suggest working in a smaller area at a time. You’ll get into a groove fairly quickly. It doesn’t take a lot of time to do. My entrance area which is 7 ft by 9 ft can be done in a weekend -maybe even a day if you don’t have a bunch of other things vying for your attention.
Avoid the area you worked on for 24 hours. After that, go back to regular use. I waited a bit more than a week before I washed my floor and I did not see any damage to the new grout color. Again, this is not something you’re going to do just for fun…. But it’s a GREAT solution if you have areas that look dirty and gross. And the price is not even comparable to changing your tile! I used one bottle for both areas in my home. One bottle will cost you 20-some dollars. So not even comparable!
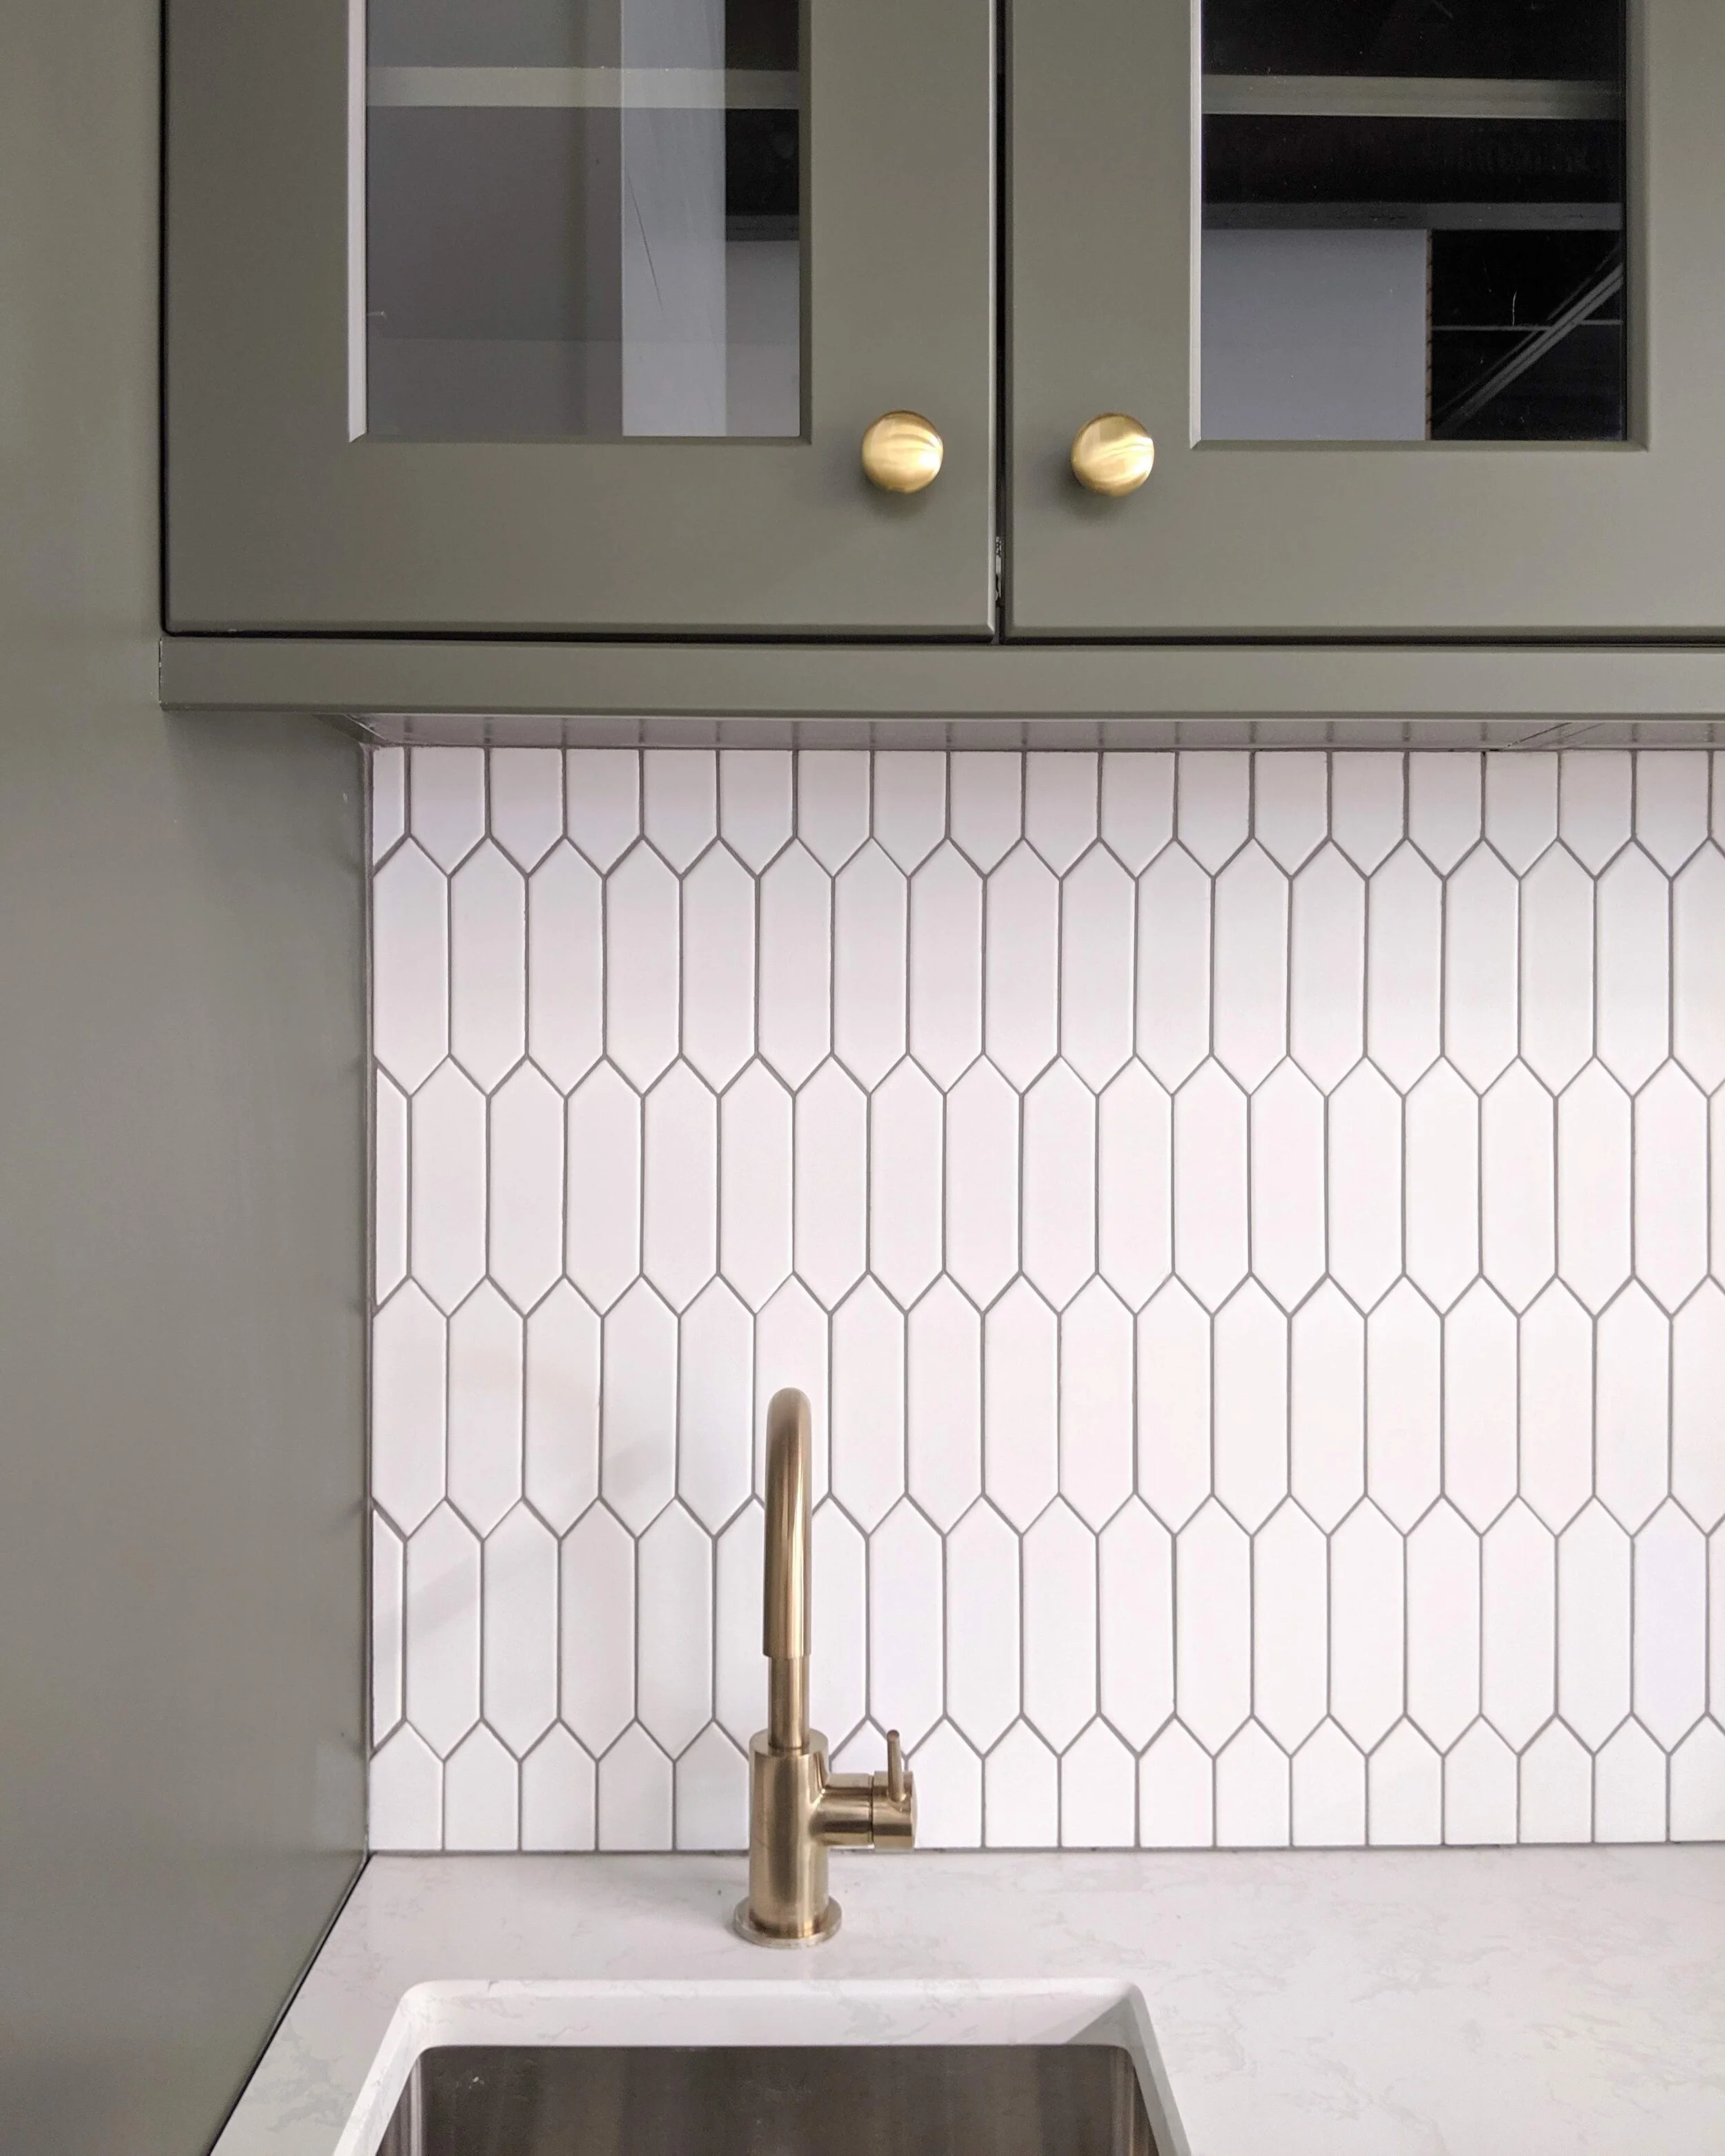
Before + After


Notice how the darker grout lines draw the eye down and make the pattern pop
Like I said at the beginning, we all make mistakes. We just can’t put ourselves in a prison of failure when we do. So, set yourself free and be okay with not always getting it right! Just try again :)
Last but not least -a little inspiration
Inspiration Sources: Cherished Bliss // Studio McGee // Construction2style // Liliidae Home & Design


If you are beyond changing the grout and you simply just want new tile, make sure you stop in and see what we have. We have brought in lots of beautiful options!


